
General Overview
Documentation / Getting Started /
Miscellaneous
- About Chat
- About Calendar
- How to add new event in calendar?
- How to add To Do List?
- How to add contact in chat?
Academics
- About Academics
- How to add Section?
- How to add Class?
- How to Assign Class Teacher?
- How to add Subjects?
Online Admission
- About Online Admission?
- How to manage online admission setting?
- How to fill online admission form?
- How to review online admission form details?
- How to print online admission form receipt?
Fees Collection
- About Fees Collection
- How to add Fees Type?
- How to add Fees Group?
- How to add Fees Master?
- How to add Fees Discount?
Examinations
- About Examination
- How to add Marks Grade?
- How to add Exam Group?
- How to assign/view student for exam?
- How to add subject in Exam?
Front CMS
- About Front CMS
- How to add menus?
- How to upload file in Media Manager?
- How to add pages?
- How to add Event?
Online Course
- About Online Course?
- How to add Course?
- How to order section?
- How to publish/unpublish course?
- How to check online course from student panel?
Two Factor Authentication
- About Two Factor Authentication
- How to enable / disable Two Factor Authentication?
- How to Setup 2FA?
- How to Install the Google Authenticator app on a mobile device?
- How to delete the 2FA account for superadmin or staff?
Zoom Live Classes
- How to generate the zoom API credential?
- About zoom live class
- How to configure zoom live class?
- How to enable/disable teacher API credential?
- How to enabled / disabled the parent for zoom live classes?
Lesson Plan
- About Lesson Plan
- How To Add Lesson?
- How To Add Topic?
- How to add Lesson Plan?
- How To Manage Syllabus Status?
QR Code Attendance
- About QR Code Attendance
- How to disabled the auto attendance and mark the attendance of student and staff using QR Code / Barcode?
- How to enable the auto attendance and mark the attendance of student and staff using QR Code / Barcode?
- How to check the student day wise attendance report?
- How to check staff day wise attendance report?
Front Office
- About Front Office
- How to Setup Front Office?
- How to add student Admission Enquiry?
- How to add Visitor Book?
- How to add Phone Call Log?
Certificate
- About Certificate
- How to add student Certificate?
- How to generate Certificate?
- How to add student ID card?
- How to generate ID card?
Transport
- About Transport
- How to create Routes?
- How to add Vehicles?
- How to assign vehicle to the Route?
- How to assign route to student?
Inventory
- About Inventory
- How to create Item Category?
- How to add Item Store?
- How to add Item supplier?
- How to add Item?
Homework
- About Homework
- How to add Homework?
- How to Evaluate Homework?
- How to check Daily Assignment Report?
- How to check Homework Evaluation Report?
Communicate
- About Communicate
- How to post new message in Notice Board?
- How to Send Email?
- How to Send SMS?
- How to view Email / SMS Log?
Student/Parent Panel
- About Student/Parent panel
- How to view video tutorial from student site?
- How to add daily assignment from the student side?
- How student can view their yearly (session) Attendance from student panel?
- How to see student dashboard?
FAQ
- Can I use special character in FiNIMS?
- How to restrict Teacher to access only their assigned student data?
- How to assign fees to student in FiNIMS ?
- Want to know about FiNIMS Biometric Attendance App?
- What is the difference between Examination and Online Examination?
System Settings
- How to add the addons on FiNIMS ?
- About System Settings
- About ID Auto Generation
- How to manage attendance type?
- How to manage miscellaneous?
CBSE Examination
- About CBSE Examination
- How to add the term in CBSE Examination?
- How to add assessment in CBSE Examination?
- How to add the observation parameter in CBSE Examination?
- How to add observation in CBSE Examination?
Student Information
- About Student Information
- How to check Student yearly (session) Attendance in his profile?
- How to check Parent Login Credential Report?
- How to Assign Fees during Student Enrolment?
- How to check class & section report?
Online Examinations
- About Online Examination
- How to add Question Bank?
- How to import question in question bank?
- How to add Online Exam?
- How to add question on particular exam?
Income
- About Income
- How to add Income Head?
- How to add Income?
- How to search Income?
- How to check Income Report?
Multi Branch
- About Multi Branch
- How to add the new branch in FiNIMS home branch?
- How to edit a branch?
- How to delete the branch?
- How to switch the branch?
Behaviour Records
- About Behaviour Records
- How to check the list of incidents?
- How to edit the incidents in the incident list?
- How to delete an incident from the incident list?
- How to add the incidents?
Gmeet Live Class
- About Gmeet Live Classes
- How to get Gmeet URL?
- How to create Gmeet Live Class?
- How to join Gmeet Live Class?
- How to check Gmeet Live Class Report?
Attendance
- How to mark student attendance?
- How to check Student Attendance By Date?
- How to check student Attendance Report?
- How to check Student Attendance Type Report?
- How to check Staff Attendance report?
Human Resource
- About Human Resource
- How to add Department?
- How to add Designation?
- How to add Leave Type?
- How to add Staff Directory?
Hostel
- About Hostel
- How to Add Hostel?
- How to Add Room Type?
- How to Add Hostel Rooms?
- How to check Hostel Report?
Library
- About Library
- How to add Book?
- How to add student as Library Member?
- How to add staff member as Library Member?
- How to Issue/Return books?
1. Student and Academic Management
Before starting with FiNIMS, consider a typical scenario of an institute offering classes from Grade 1 to 12. Each class may have multiple sections such as Section A, Section B. Various subjects are assigned to different classes, including both theoretical and practical subjects. Exams are designed using these subjects and class structures. Students can be admitted as new entries or promoted from their previous class after successfully passing. During the academic period, fees are collected either monthly or as a one-time payment. FiN IMS also helps in maintaining student attendance efficiently. Additionally, if the institute provides transportation, hostel, or library facilities, FiN IMS allows tracking and managing these resources seamlessly.
2. Staff, Teachers, and Communication
An institute requires teachers to educate and manage students effectively. FiN IMS allows smooth communication between teachers, students, and parents. All staff members, including teachers, accountants, librarians, and receptionists, can be given specific access based on their roles. FiN IMS supports eight default roles: SuperAdmin, Admin, Teacher, Accountant, Librarian, Receptionist, Student, and Parent. Furthermore, administrators can create unlimited custom roles to meet the needs of the institute’s staff.
3. Financials, Reports, and Multi-Class Support
FiN IMS helps institutes maintain all financial records, including tuition fees, miscellaneous expenses, and salary payments. The system also generates comprehensive reports for better analysis and decision-making. For training centers or institutes admitting students in multiple programs, the multi-class feature allows a single student to be enrolled in more than one class simultaneously. Overall, FiN IMS provides a complete solution for managing all aspects of institute operations, ensuring efficiency and transparency.
Admin Panel :- Login to Admin Panel through URL – http://yourdomain/site/login

After successful login you will reach the Admin Dashboard. Below you can find navigational overview of the user screen.
Admin Panel Modules in FiN IMS
The Admin Panel of FiN IMS consists of 26 modules as listed below:
Front Office – Handles all reception and front office activities including enquiries, phone calls, visitor management, and postal receive/dispatch.
Student Information – Stores complete student details including profiles, admissions, and academic history.
Fees Collection – Manages all student fee-related operations such as creating fee structures, collecting payments, tracking dues, and generating fee reports.
Income – Tracks all income other than student fees, including adding income entries, searching records, and managing income categories.
Expenses – Maintains all institute expenses such as adding new expenses, searching, and organizing under expense categories.
Attendance – Records student attendance and generates attendance reports.
Examinations – Manages all exams conducted by the institute including creation, scheduling, marks entry, and grading.
Online Examinations – Handles the management of online exams conducted for students.
Lesson Plan – Tracks subject progress and manages lesson planning for each class.
Academics – Covers all academic settings like managing classes, sections, subjects, assigning teachers, creating timetables, and promoting students to the next grade.
Human Resource – Manages staff information including profiles, attendance, payroll, leaves, and other HR operations.
Communicate – Acts as an internal messaging system to share announcements with students, parents, and staff.
Download Center – Organizes downloadable resources such as assignments, study materials, syllabi, and other documents for students and teachers.
Homework – Allows teachers to assign homework and evaluate submitted work.
Library – Manages all library books and resources efficiently.
Inventory – Keeps track of all institute assets including stocks and storage management.
Transport – Organizes transportation services including routes, stops, and fares.
Hostel – Manages hostel facilities including rooms, allocations, and associated charges.
Certificate – Designs and generates student certificates and ID cards.
Front CMS – Controls the institute’s public-facing website including pages, menus, events, gallery, and news updates.
Alumni – Maintains records of past students and organizes alumni-related events.
Reports – Provides detailed reports for different modules to analyze institute operations.
System Settings – Configures FiN IMS settings such as institute details, sessions, SMS, payment gateways, backups, and language preferences.
Calendar & To-Do List – Tracks daily and monthly activities and allows creating tasks in a to-do list.
Chat – Enables two-way messaging between staff and students.
One-Click Updater – Installs new updates in the system quickly and easily.
Additional Addon Modules in FiN IMS Admin Panel
The Admin Panel of FiN IMS also offers 8 addon modules (these extensions need to be purchased separately):
Zoom Live Classes – Conduct live classes for students and hold live meetings for staff using Zoom integration.
Gmeet Live Classes – Organize live classes for students and virtual meetings for staff using Google Meet.
Multi Branch – Manage multiple branches of your institute efficiently under a single FiN IMS login.
Two-Factor Authentication – Enhance login security for FiN IMS by enabling two-factor authentication.
Behaviour Records – Maintain detailed records of student behavior, including unique mannerisms, habits, and speech patterns.
CBSE Examination – Supports different examination patterns specific to CBSE curriculum.
Online Course – Offer online courses for students, staff, and even guest users.
QR Code Attendance – Facilitate attendance marking for students and staff using QR code scanning.
Configuring FiN IMS for Your Institute
To understand how FiN IMS works, the first step is to configure and set it up for your institute. In this guide, we will use a sample institute named Mount Carmel Institute to explain the setup process.
Steps to Set Up Your Institute
Navigate to the Admin Panel and go to System Settings > General Settings to begin configuring your institute details.

2. Update your Institute Information – Enter your institute name, institute code (this represents your affiliation or accreditation number), along with address, phone number, and email details. For other configuration options, please refer to the System Settings section. Once all details are filled in, click the Save button to store the updated record.
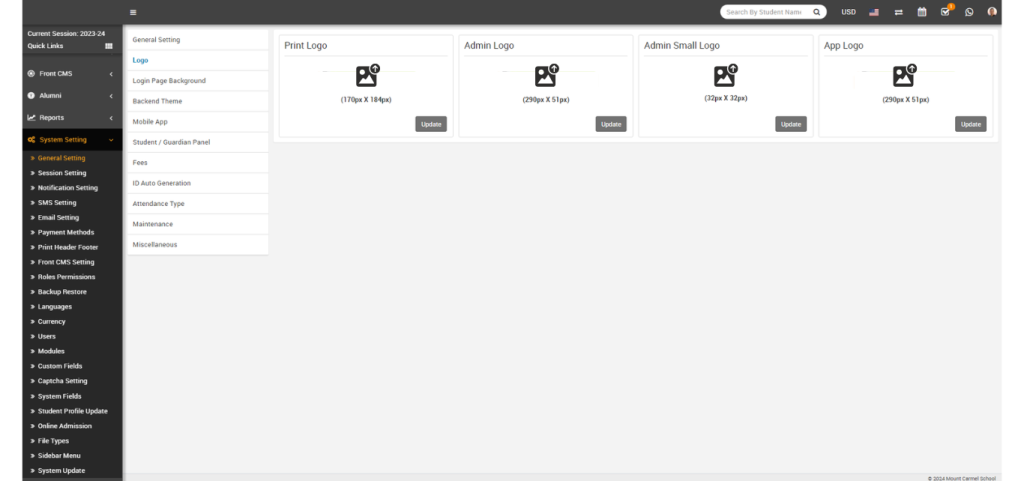
3.Update Institute Logos – To update your institute’s print logo, go to System Settings > General Settings and click on the Edit Print Logo button located at the lower left side. It is recommended to upload a .png file with a transparent or white background, ideally sized around 200px x 200px. You can drag and drop or manually select your logo file. Additionally, use the Edit Admin Logo and Edit Admin Small Logo options to set logos for the Admin Panel, while the Edit App Logo option allows you to configure the logo for the mobile application.
Configure SMS Gateway – To enable automated SMS notifications, integrate an available SMS Gateway by entering the required details under System Settings > SMS Settings.

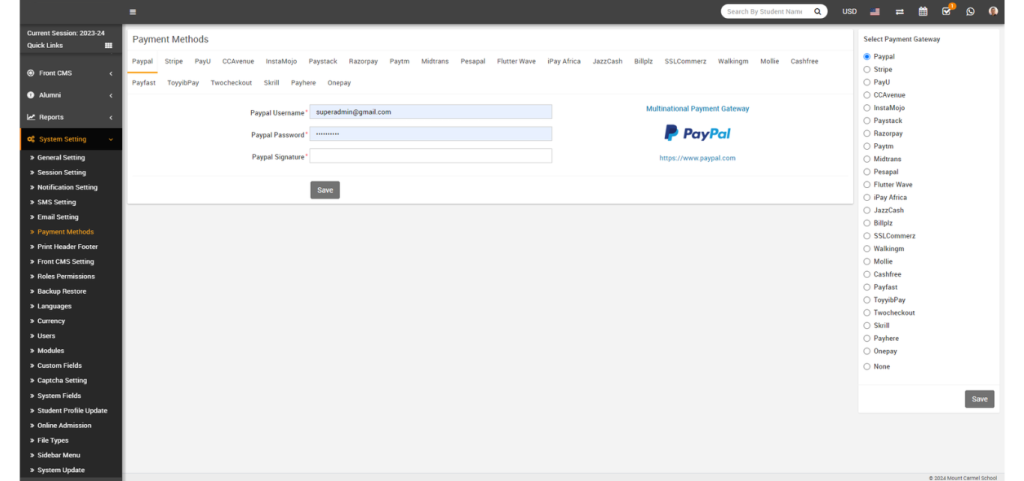
5.Enable Online Payments – To activate online payment options in the Parent Panel and Student Panel, go to System Settings > Payment Methods. Select your preferred payment gateway, enter the required account details, then click Save. Finally, enable the gateway from the toggle box on the right-hand side.
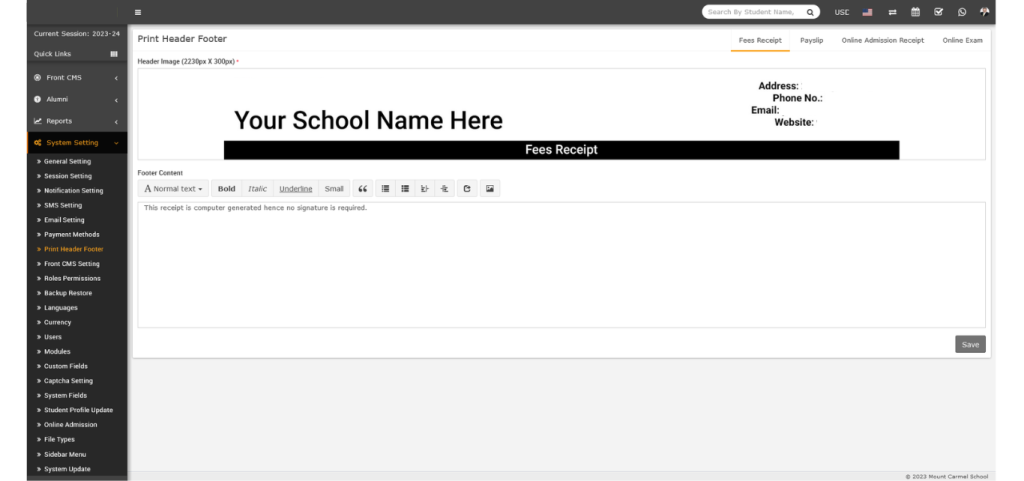
6.Customize Print Header & Footer – To update the header image and footer text for Fee Receipts and Payslips, go to System Settings > Print Header Footer. Drag and drop or select your desired header image, then enter the footer content and click Save. You can also update header and footer settings for Fee Receipts, Payslips, Online Admission Receipts, and Online Exams by switching between the available tabs on the top-right corner of the page.
7.Complete Basic Setup & Add Academics – After finishing the basic configuration of your institute in FiN IMS, the next step is to set up the academic structure. This includes creating Classes, Sections, Subjects, and assigning Teachers to them.
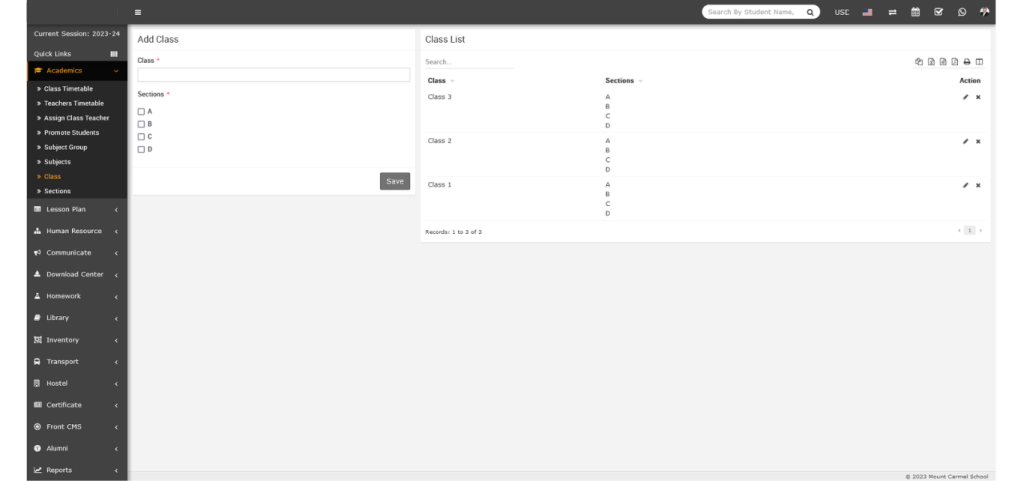
8.Add Classes & Sections – To create classes in FiN IMS, first add the required Sections by navigating to Academics > Sections. Once sections are created, go to Academics > Classes to add new classes and assign the appropriate sections to each class. Use the Add Class form on the left side to enter details, while the list of already created classes will be displayed on the right side. Make sure to add all the classes offered in your institute here.
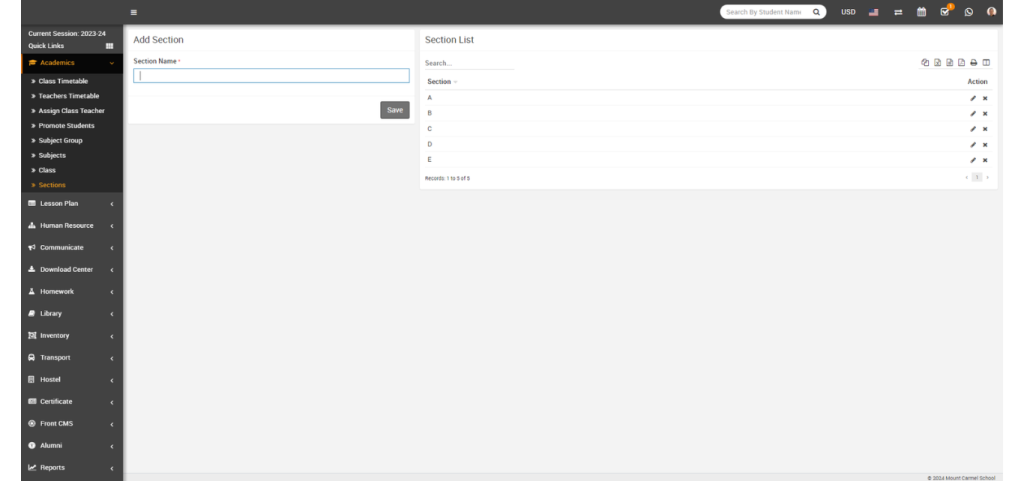
9.Add Sections – To create sections in FiN IMS, go to Academics > Sections. Use the Add Section form on the left side to enter new sections, while the list of existing sections will appear on the right side. Enter all section names used in your institute. For example, if Class 1 has three sections (A, B, C) and Class 2 has only two sections (A, B), then add sections A, B, and C here. Later, while creating classes, you can assign the relevant sections to each class.
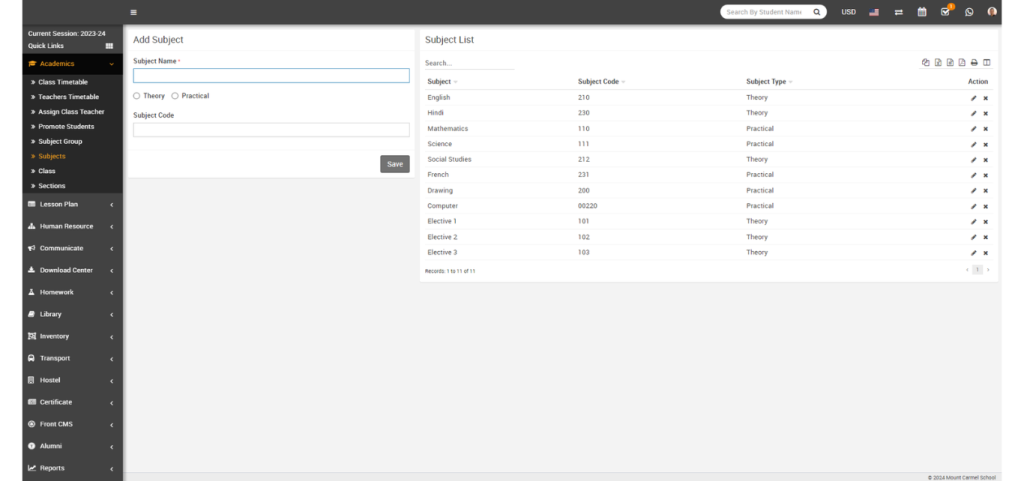
10.Add Subjects – To create subjects in FiN IMS, navigate to Academics > Subjects. Use the Add Subject form on the left side to enter new subjects, while the list of existing subjects will appear on the right side. Add all subjects taught in your institute, including both theory and practical subjects. In the next step, subjects can be grouped and assigned to their respective classes through Subject Groups.
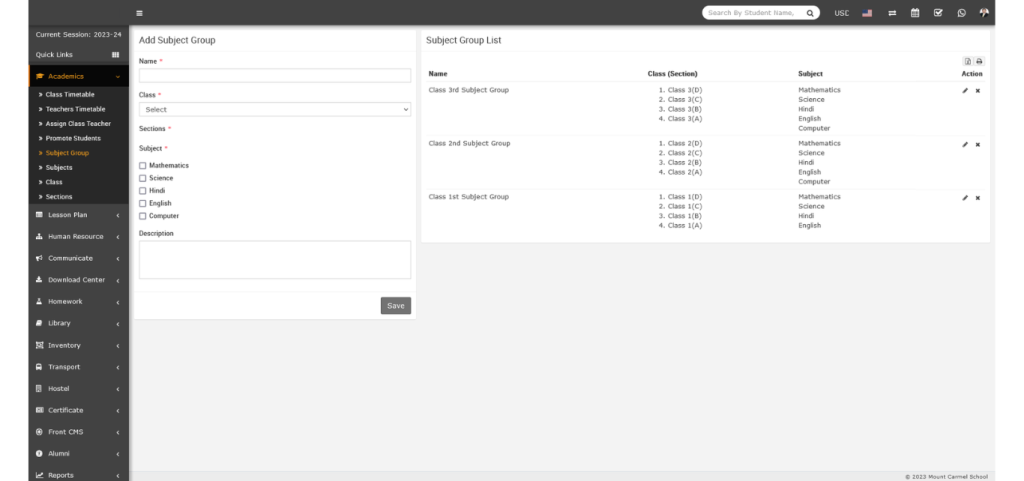
11.Assign Subjects to Classes – To link subjects with their respective classes in FiN IMS, go to Academics > Subject Group. Create a subject group by entering its name, then select the relevant Class and Section. After that, choose all the subjects you want to include for that class and section as a group. Finally, click Save to apply the assignment.
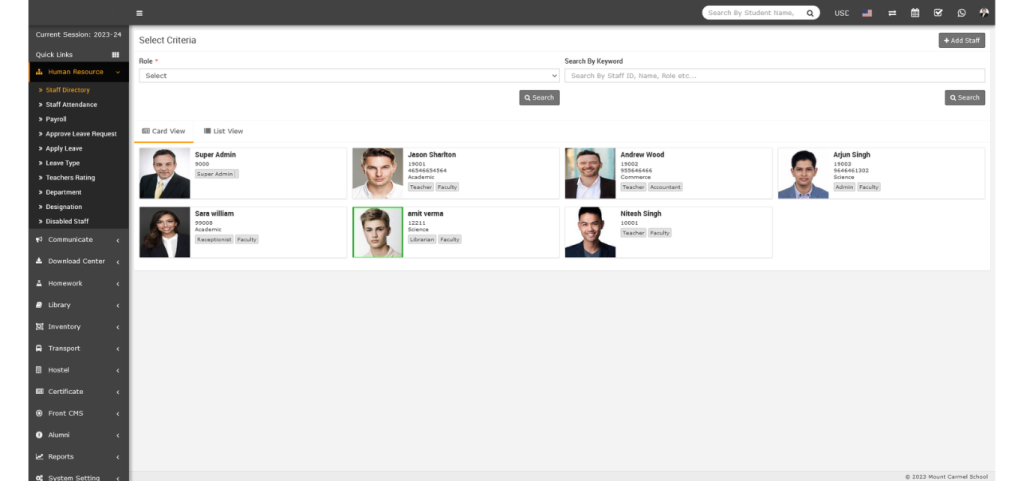
12.Add Teachers – To add teachers in FiN IMS, navigate to Human Resource > Staff Directory. Click on the Add Staff button located at the top right corner. On this page, you can add any staff member by selecting their role. When creating a teacher profile, make sure to choose the Teacher role along with the appropriate designation.
13.Setup Completed – Congratulations! You have successfully completed the basic setup of FiN IMS. To explore and understand each module in more detail, please refer to the respective module’s documentation or article.